Showing posts with label annie sloan pure white. Show all posts

Friday, February 22, 2013

Ballard?.....SCHMALLARD!


So.....a few weeks ago, I got an email from a previous customer who had an antique dresser of her grandmother's that  was in great shape BUT she wanted to have it "shabbied" *painted, distressed, waxed and all that good stuff..Their FIRST thought was to go with just a basic antique white..PERFECT! Bring it on over!


SO... I stock up on A.S.C.P Pure White and a can of Old White and was ABOUT to get busy when she texts me that they have changed their mind on color...OOKKKKKK...what did you have in mind? "Well, I emailed you a link to Ballard designs. We found a bed in this color that we love!


We want to see if you can match it?..uuhhh...SURE! 
Thee Ballard designs!: The place that sells dog treats for $100 bucks!?@#$%*... 
Ballard Designs: the place that sells rugs worth more than my engagement ring?! yikes...
No pressure right?

 Replicate Ballard Designs..No PROB!Bring it on...teeheehee...Well, ladies and Gentleman..I was intimidated at first BUT chaknow whaaaaaa' I think I did a prett-ie sweet job..I really like it and I hope you do too...

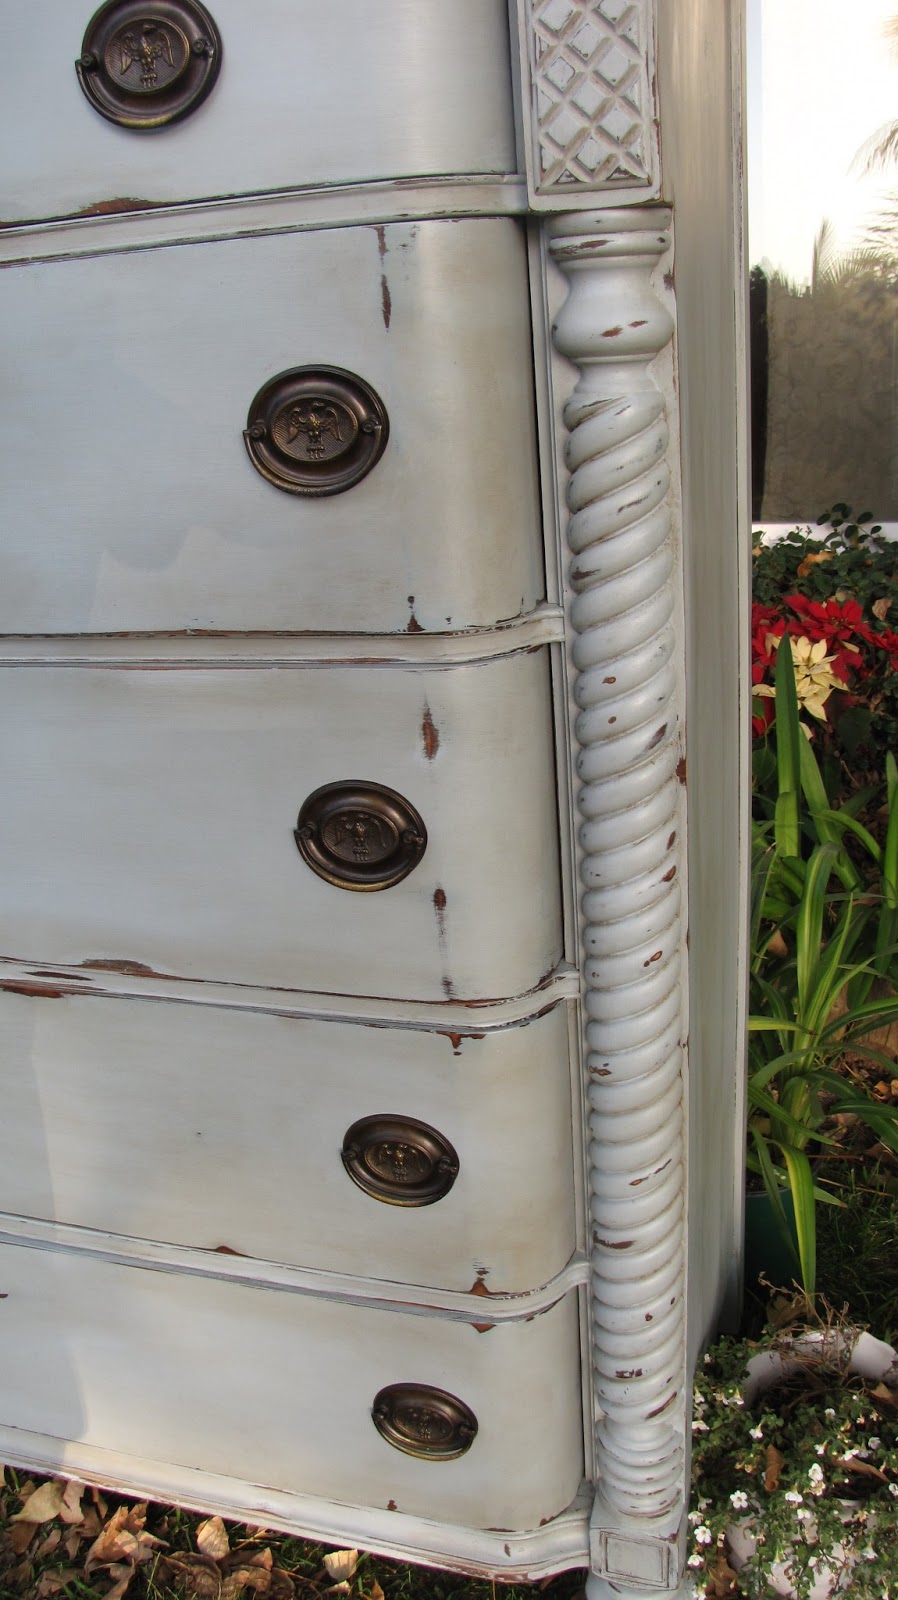
So...It IS a sweet piece..great scroll work and carvings and awesome hardware.... yum!!


Now, at first glance..I thought the color looked like a dead ringer of Duck Egg Blue BUT, if you look at the picture 38,972 times... *But WHO's counting right?


You see MORE than Duck Egg..It's a very GRAY blue .So I got all "Bill Nye the science guy"

 and got busy concocting my "Ballard Blue"

This is at the VERY Beginning of my blend BUT basically it turned out to be 1/2 Paris Gray , 1/2 Provence and a DAB of  Old White by the time I got done!
I did my usual, and turned it upside down 1st to get all the hard to reach bits out of the way..

Painting in the kitchen of course!
*Hey! It was 55 degrees in So Cal...That's INHUMANE conditions to be outside!! ;}


Once the body was done we had to deal with the top... =/

She told me that the body was great BUT it looked like granny momma had been leaving her denture cup on the top of the dresser for 80+ years... =<

It had a pretty gnarly water ring stain... BUT, Restore A Finish to the rescue!


Going


Going...


GONE!

Woohoooo..with THAT done I was able to distress her, and wax her up in clear & dark wax...


and call it a day...


Well there she is..my Ballard knock off...hope you like!
Thanks for stoppin' by...see ya soon!

Smooches...

Meliss


This.
 girl.
 likes.
 to...
 party all the time, party all the time, party all the tiiiiiiimmmme!

Friday, February 17, 2012

Union Jacks!


I know I am sooooo 2011 with this, BUT I finally have jumped across the pond and did my versions of the Union Jack. I have a provincial dresser that I will do BUT I wanted to practice on these 2 side tables.. I think they came out really cute, So I wanted to share with you all in case someone else wants to try it!

You will need
LOTS of painters tape.
Piece of Chalk
Red,White and Blue paint.
Since I LURV Chalk Paint. I chose
Pure White, Emperors Silk and Napoleonic Blue by Annie Sloan.

*Since I did 2 different tables I will be interchanging pictures for the tutorial FYI*

Here is the before:

Clean your piece up (A little diluted TSP is my Fave)

In order to correctly draw out the union jack, I used a very helpful site that you can visit here


Tape off your red cross first..


Paint it, let it dry..and remove the tape..


I taped off the red now and painted the white outline 


Here's where your chalk will come into play! 
Draw out the rest of the flag and keep going..


I did the blue first..


You get the idea...


Here it is all painted, waxed and ready for distressing..


*Note, I LURRRRRV Chalk paint BUT this WAS challenging sanding and distressing, with all the vibrant colors so close to one another because this stuff distresses a little too well for this scenario..Make sure you wax each color section well before you distress, to minimize bleeding/blending of the colors.

Here's the white base table after sanding and chipping..

I then applied a second coat of my dark wax "mash up" to give it an aged patina 
Put your clear wax on a little plate,
Then, mix IN your dark wax..now you have a uniform blend of the 
dark wax & the clear and it just makes
it so EASY to wipe off, when it's mixed like this! 

So, apply your dark wax, buff and take their purrdy pictures!


Cheerio Ol' Chaps!
~Melissa

Tuesday, January 31, 2012

Hollywood Regency?

Nah'....more like HollyWEIRD Regency!
I went to an estate sale this weekend and scored some really cool pieces 
BUT I think one of my favorites has to be this little lady in the back...


Man O' Man! This poor little lamp was a HOT MESS.COM!!!!!!
I saw her sitting in a corner at an estate sale..
She was Gaudy as all get out and diiirrr-T!


Disclaimer * I KNOW this glass shade SuCKS! 
But it's what it came with, I shall be on the hunt for a new bonnet for Ms. Lady...*

First things first, I grabbed my fabuloso, (Which I Luuuurv, )
If you haven't tried the all purpose cleaner called "Fabuloso"
 Oh honey! You haven't LIVED! hahahh
 Truly, it smells soooo goood! OK. Anyway, (Shit, you guys KNOW I get off topic..)
 I cleaned her up..


And once it was all dry, I used ASCP in "Pure White"
 to get the perfect shabby white I envisioned her in!


2 coats later...
Here she is pre distressed / waxed..


Of course, I couldn't leave her like THAT!, 
I brought her in, applied the wax and got to "Shabbying" her up..


Clear waxed applied..

Light Sanding..

And a little dark wax applied...


And here she is.... 


From Hollyweird Regency to Shabby Chic ROYALTY!


 Friday 2/3

UPDATE!!
O.K., Tell me whatcha' think of this...


What if, I recovered a drum shade...Maybe add ruffles to the bottom?
OR Another person suggested maybe hanging something from the glass shade. I DO Have Chandelier crystals I could hook off of it...

O.K. Officially confused =(

What says you?


Besos!
~Melissa